*updated on December 24, 2017
Preface
I really shouldn’t say much about the desire to have a wireless PC-Hifi setup. Despite having a large collection of CDs and LPs, I feel that digitizing my music library would be beneficial in some circumstances.
Though Audiophonics’ official website shows compatibility with Volumio (a multi-platform music player), I have spent a great deal of time in the last several days and, honestly, had quite a terrible experience when piecing together Audiophonics and Volumio.1 Even so, I am really pleased with the sound from DietPi, which is more distinct and pure, as well as the efficient start time and UI design, and, ultimately, the stability when compared to Volumio.
As a result, the purpose of this article is to serve as a resource for serious philharmonicgeeks who have a limited budget but a need for “adequate” high fidelity quality.
The General Workflow
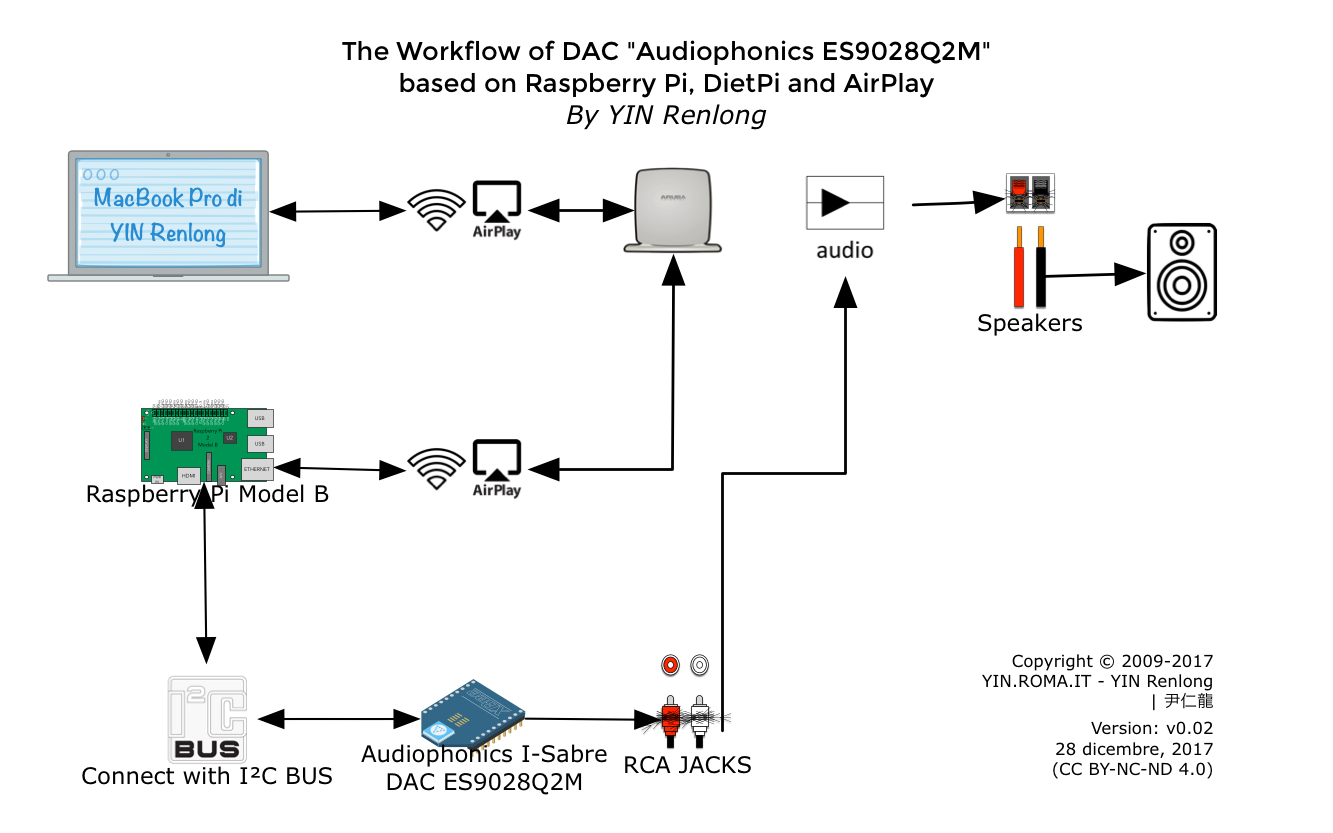
The Preparation
- 1x Raspberry Pi Model B v1.2
- 1x Audiophonics I-Sabre DAC ES9028Q2M (for Raspberry Pi 3, 2, A+, B+, with SPDIF & I2S input)
Ps: Since Audiophonics ES9028Q2M has been produced two version: one could be able to connect directly with I2S of Raspberry Pi; in the mean time the Kali version2 requires a Kali i2s Reclocker . Be sure to choose the right version.
The installation of DietPi in Raspberry Pi
A faithful guide can be founded here: Setup Diet Pi on Raspberry Pi 3 – Lightweight Server OS
Configured it firstly and go forward to III section.
The configuration to DietPi:
After all the configuration of OS, let’s start the configuration to the DietPi part. An adequate proficiency of Linux knowledge would be much helpful and advantageous.
- Connect Raspberry Pi to wireless
Login into DietPi by using the default password dietpi:
ssh root@192.168.0.7
Ps: the IP address may vary as 192.168.0.7, check the router’s Ethernet page to fint it out
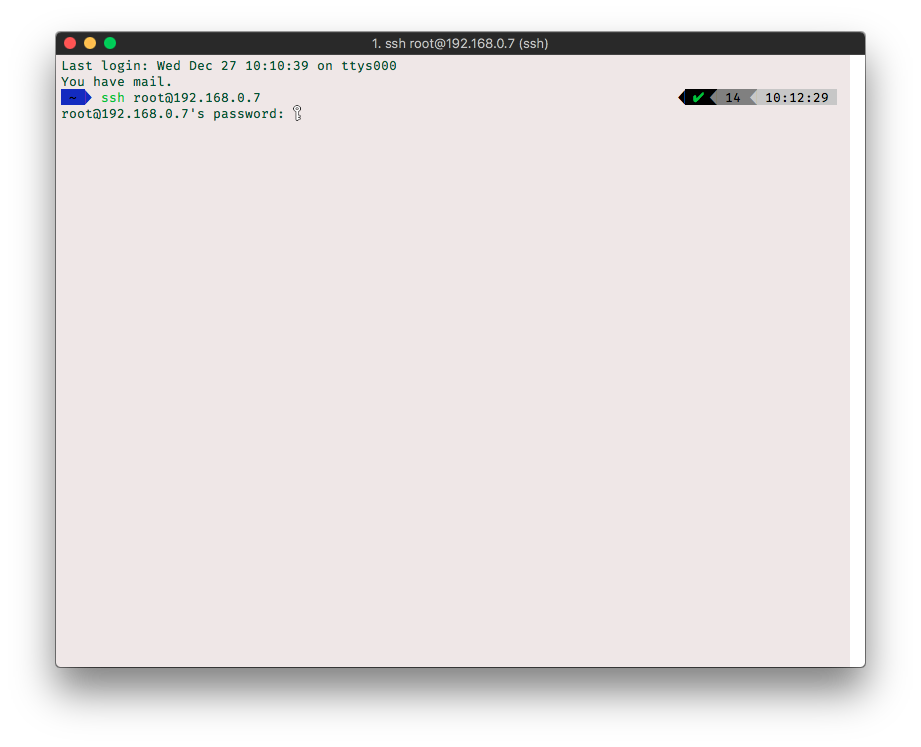
Successful login should look like:
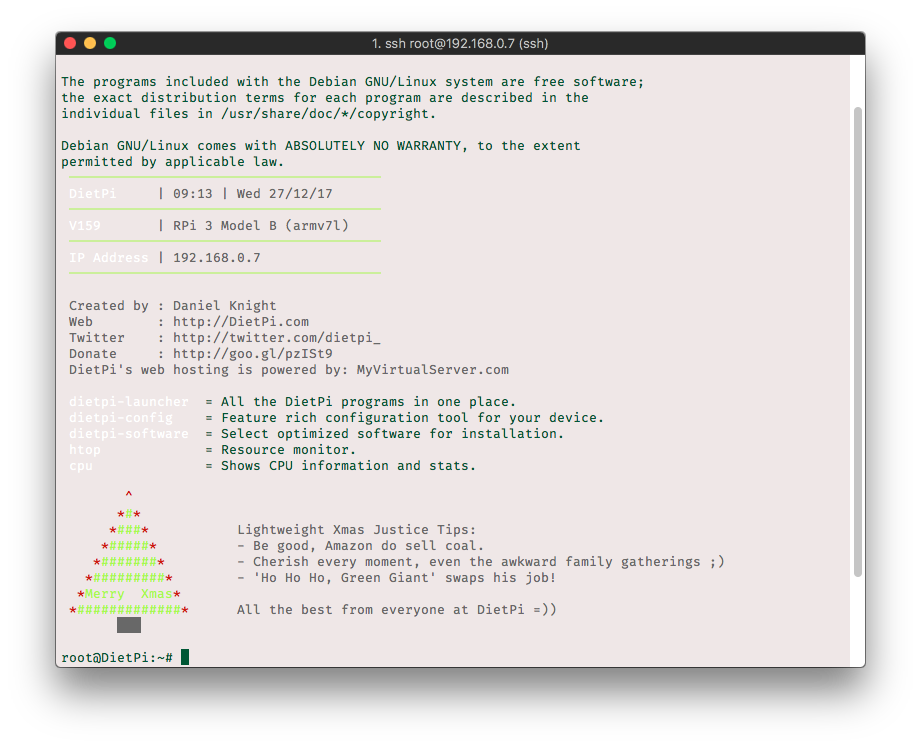
Input
dietpi-config
Locate to the
7 Network Options: Adapters
Shows as:
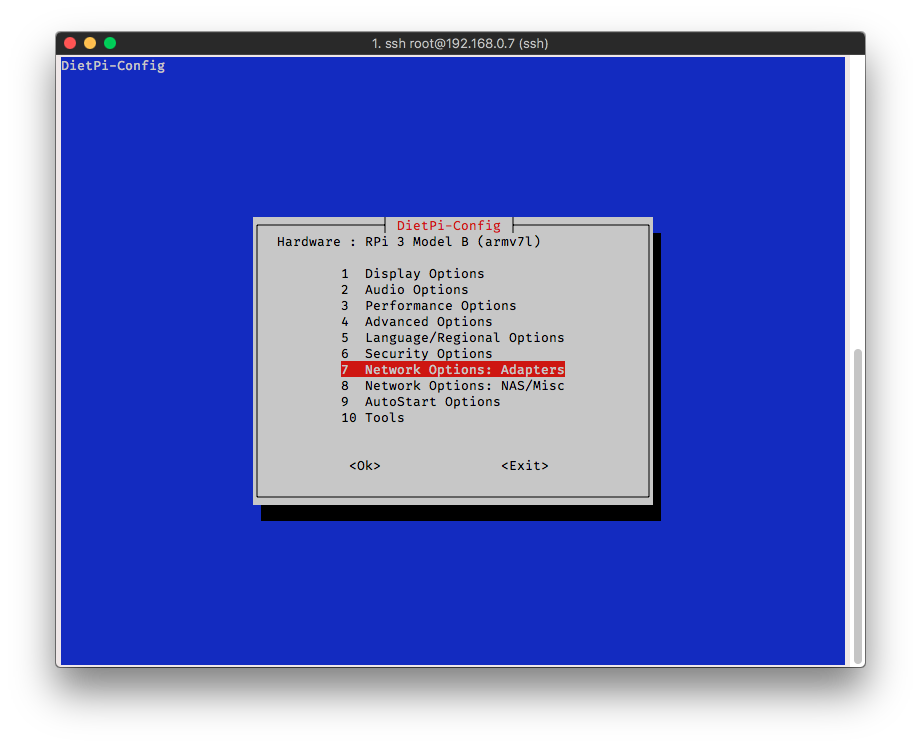
Locate to Network Options: Adapters
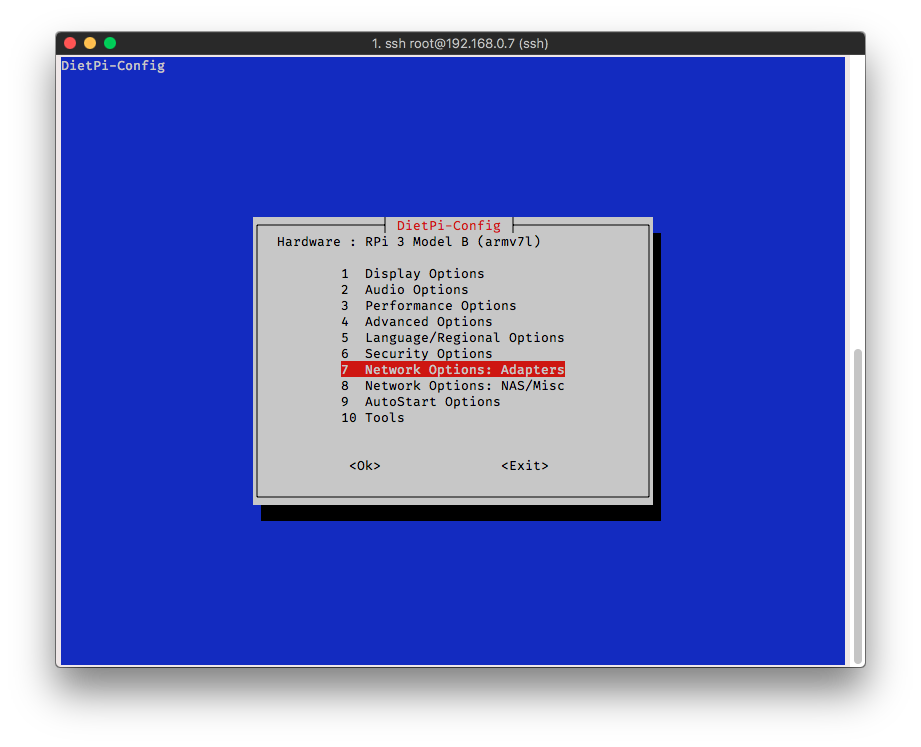
and make sure onboard Wifi is Enabled, other wise enable it by clicking Enter
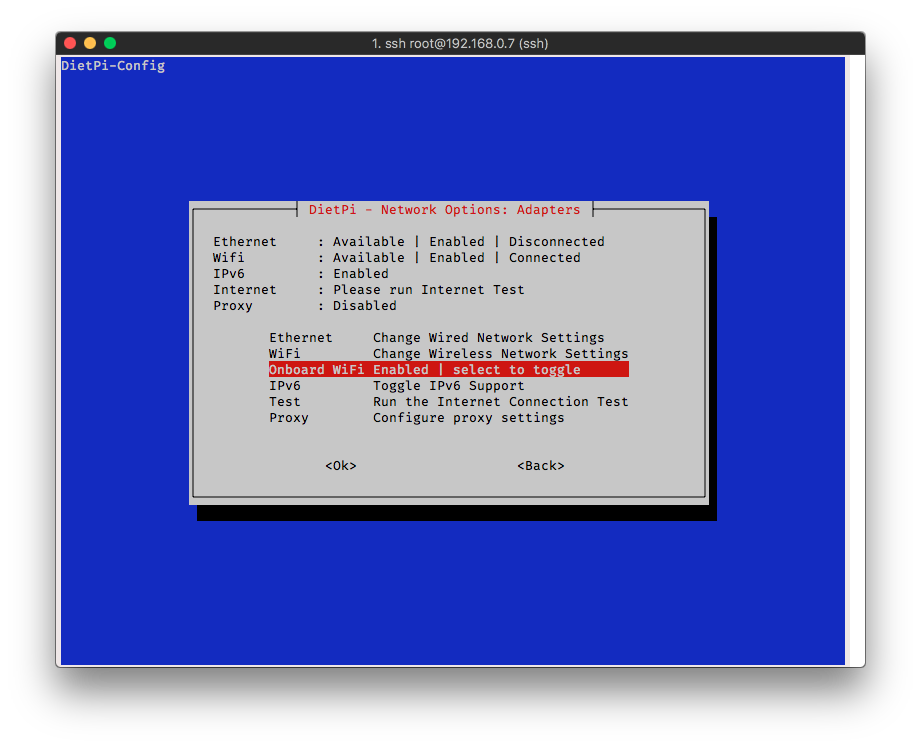
Then select
Scan and Connect
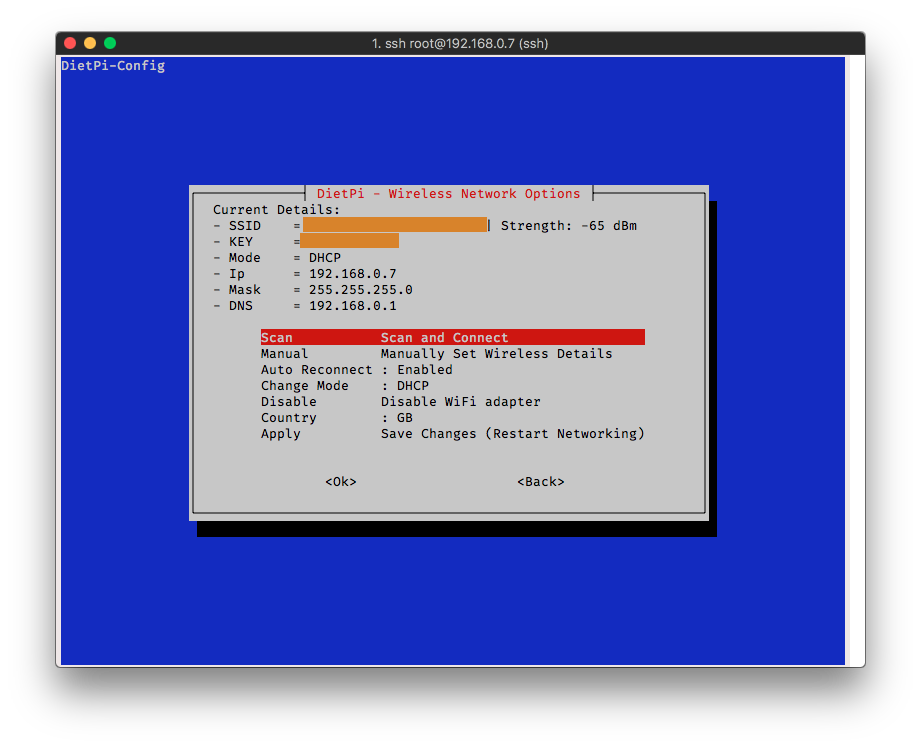
Choose your Wireless board case name and insert the password.
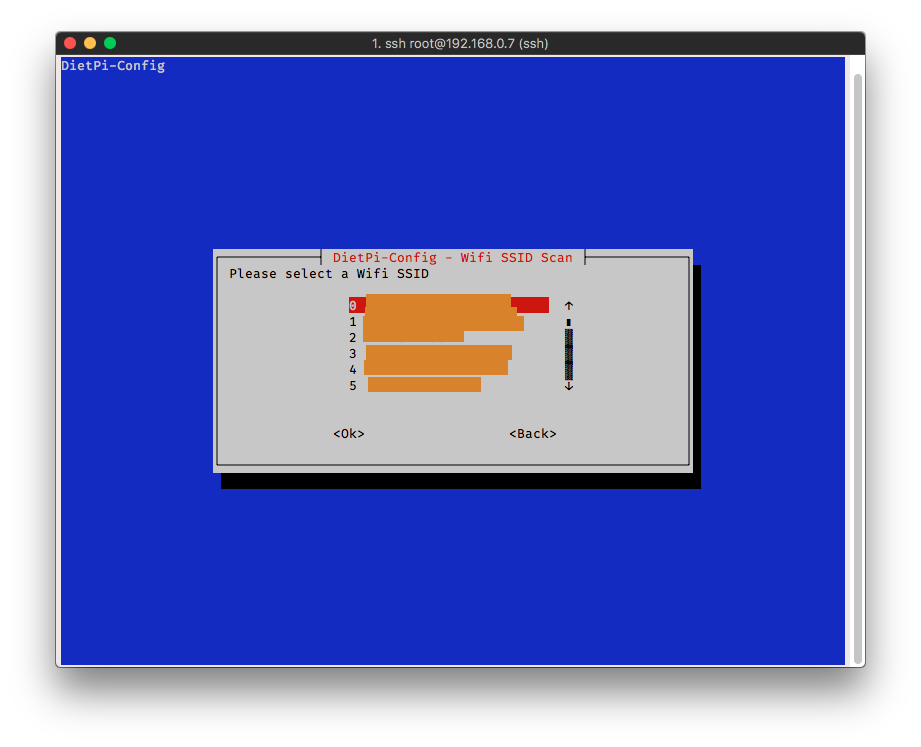
Save and quit.
After this step, Raspberry Pi will restart and would connect to Wifi automatically, Thus RAP could able to disconnect from Ethernet port of router now.
Set up audio card opinion
In this setp, shall type
dietpi-config
and locate to Audio Options
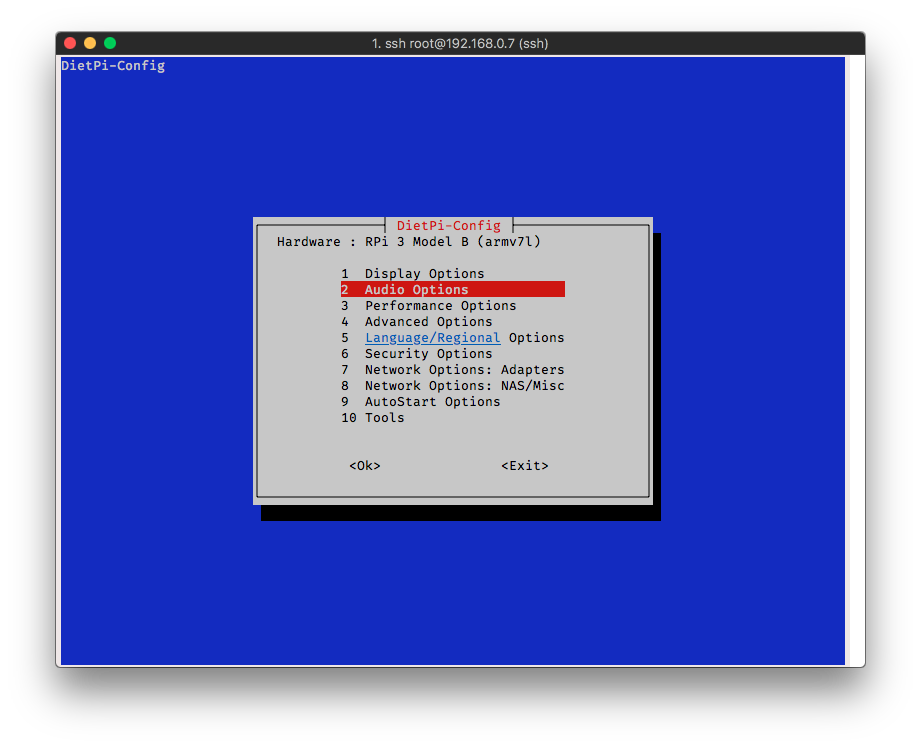
find out “Soundcard Tab”
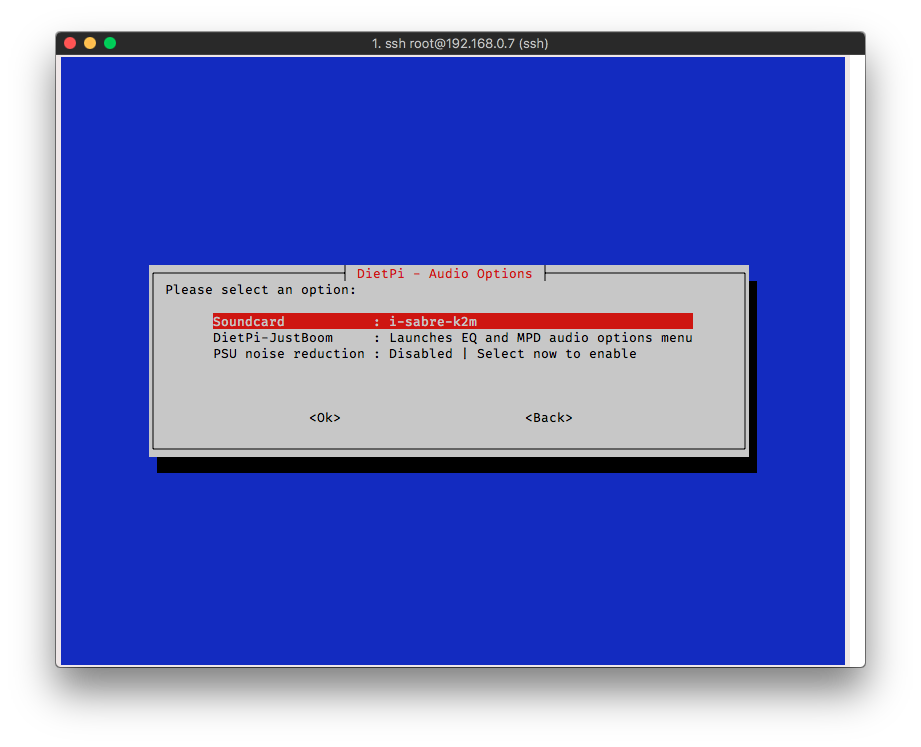
and choose sound card i-sabre-k2m AudioPhonics I-Sabre ES9028 Q2M as shown in the picture
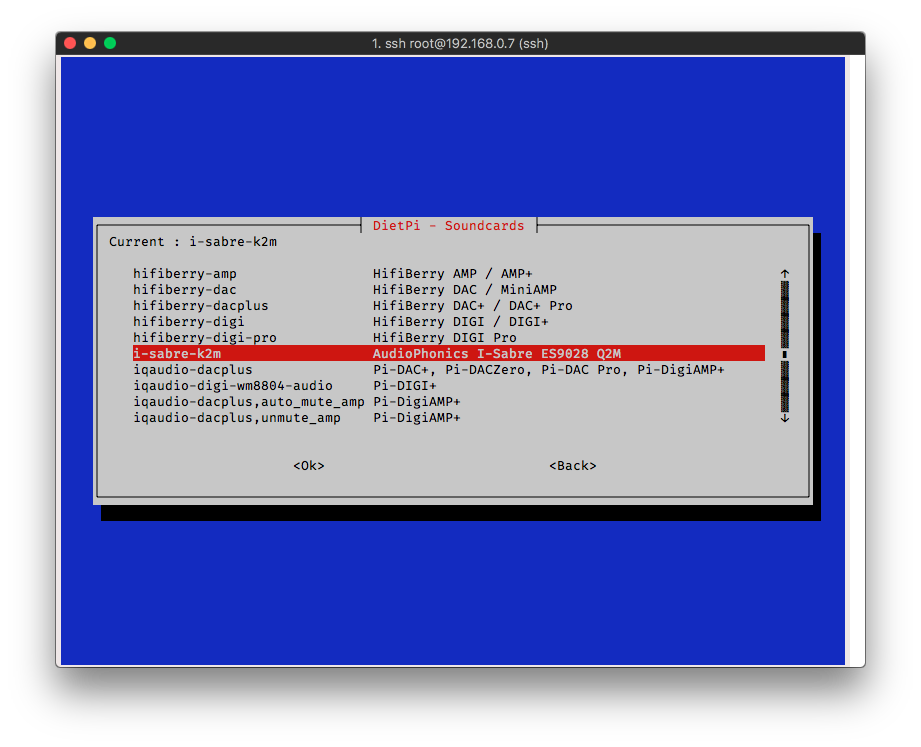
save and waiting for the installation.
AirPlay configuration
Thanks to the project Shariport, which makes it much easier the configuration of AirPlay.
- Method I
Input
dietpi-software
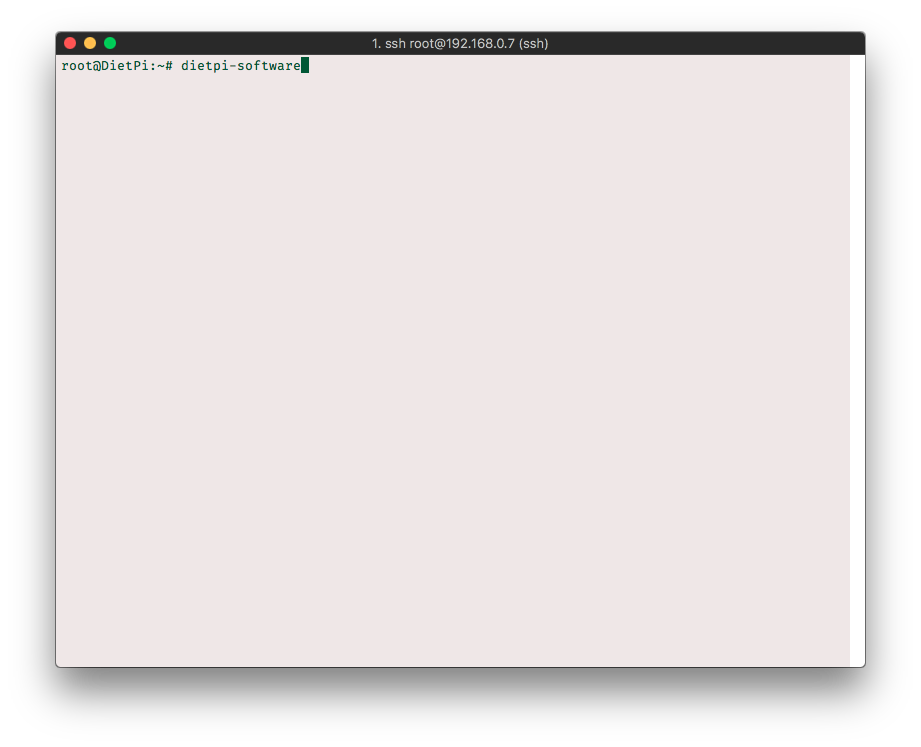
and select Software Optimized Select DietPi optimized software for installation
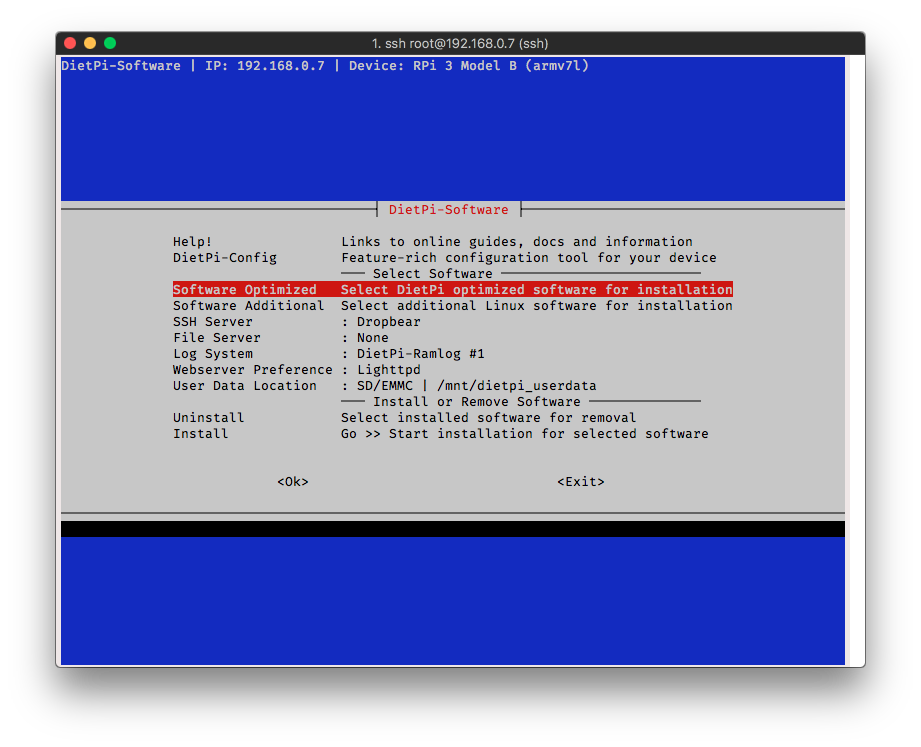
Scroll down to number Shairport Sync: airplay audio player with multiroom sync (shows number 37 in menu)
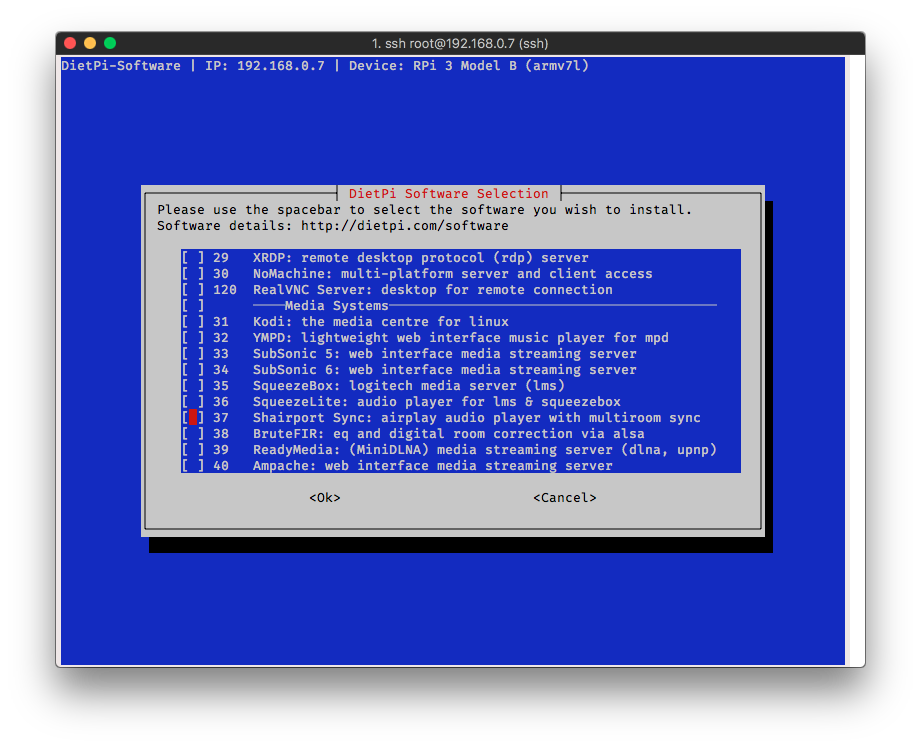
go back to previous menu
Choose Install Go >> Start installation for selected software
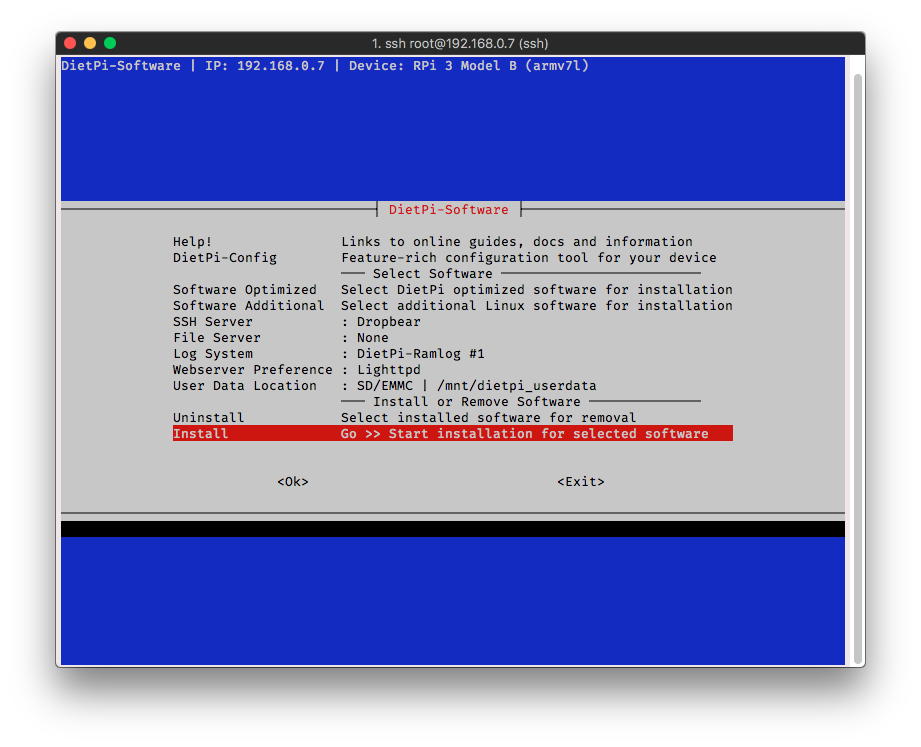
It may take a long time.
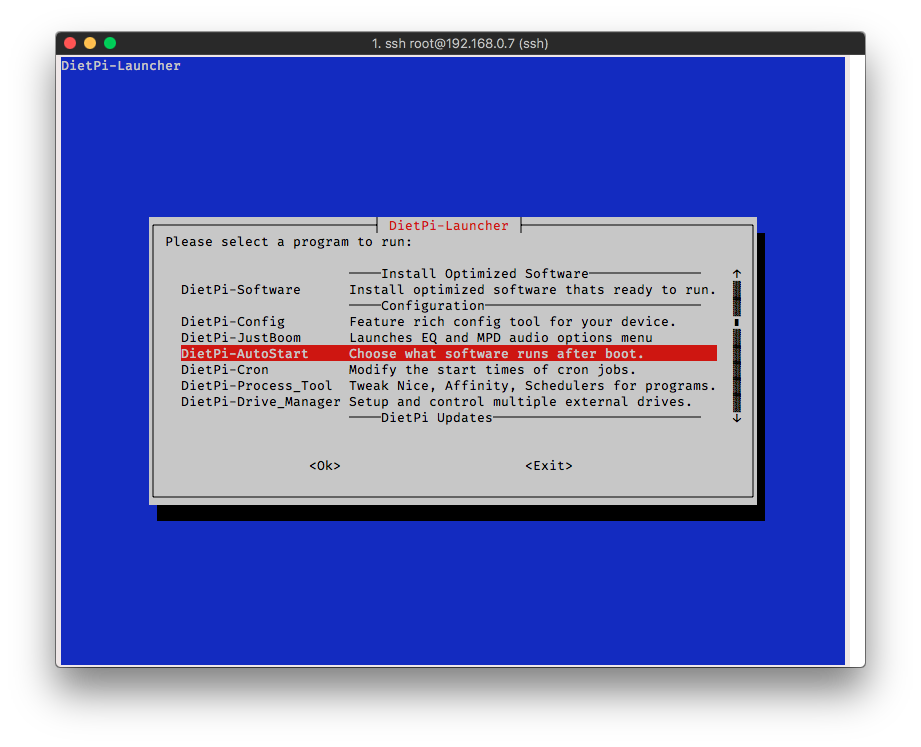
If want to use AirPlay after startup of system, you should enable Autorun of Shairport-sync:
Ps: In case of install error which heppen to occurre like my occasion:
Error - Unable to Install Shairport Sync: airplay audio player with │ multiroom sync

http://ftp.us.debian.org/debian/pool/main/o/openssl/libssl1.0.0_1..0.1t-1+deb8u6_armhf.deb is offline and/or unreachable.
Then should look fowart to method II:
- Method II
Just install Shariport as a normal application in Linux-based system:
sudo apt-get install shairport-sync
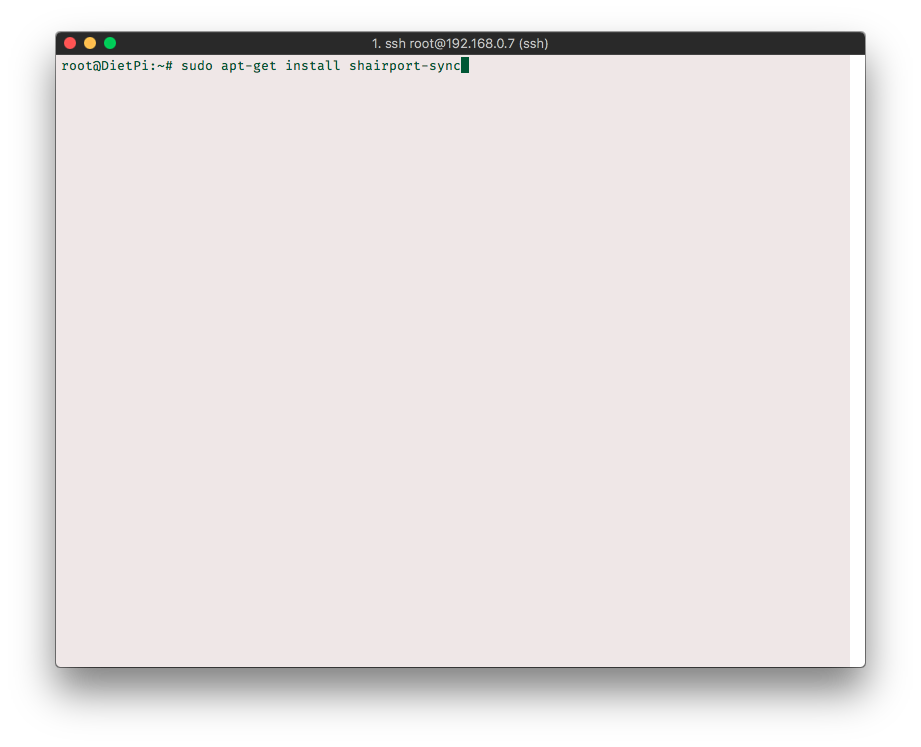
Which works well in the same way.
- Method III
Compiling from source, coming soon.
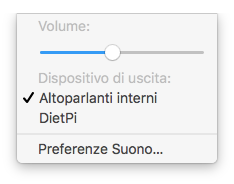
Till now, your DAC would function regularlly and can be recognized directly (make sure Pi and your computer is connected under the same network) as AirPlay device in Mac or iOS system:
The improvement of system
As the default configuration would occur choppy playback at a certain probability, it would be necessary to improve the system performance and sound quality.
- Enable Soxr3:
The official document indicates: Soxr interpolation will improve the output audio quality on Shairport. However, it is extremely CPU intensive. Personally I make it enabled.
Method of Enable:
sed -i '/interpolation = /c\interpolation = "soxr";' /usr/local/etc/shairport-sync.conf
Then restart all Dietpi services
dietpi-services restart
Method of Disable:
sed -i '/interpolation = /c\\/\/interpolation = "soxr";' /usr/local/etc/shairport-sync.conf
The same way
dietpi-services restart
- Troubleshoot:
If happened choppy (brokenly) playback, the priority (which call nice in DietPi) should be increased.
or try to
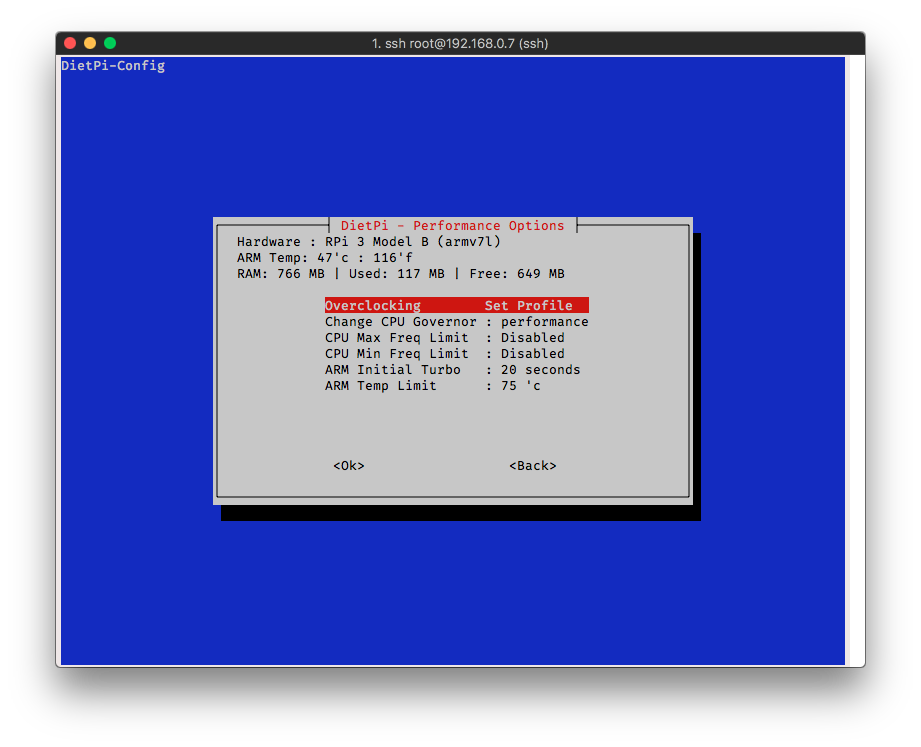
- Improve CPU Governor type
Type
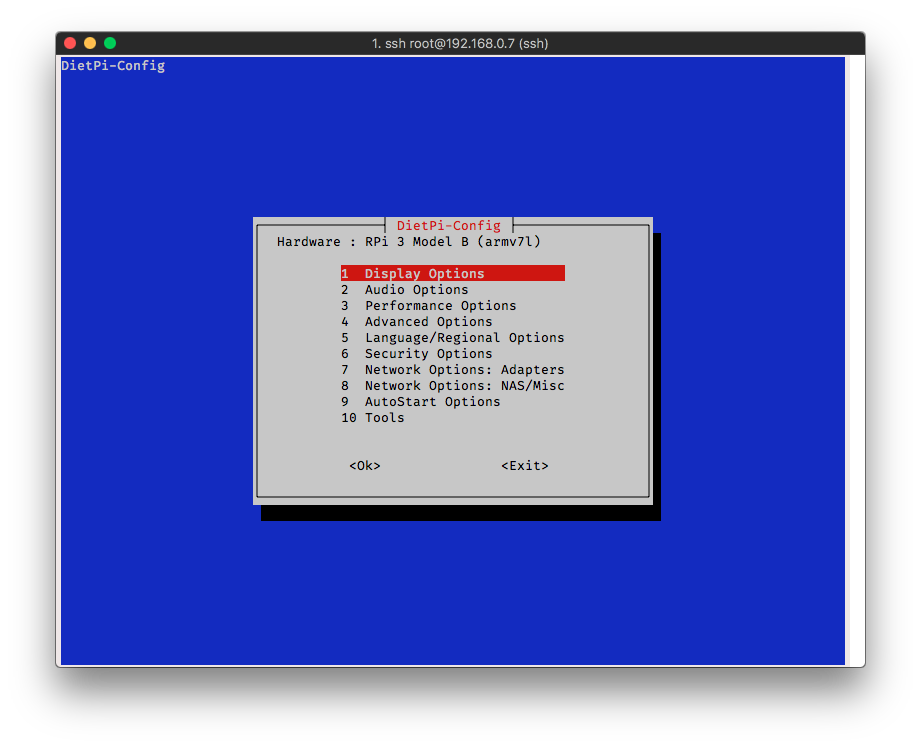
dietpi-config
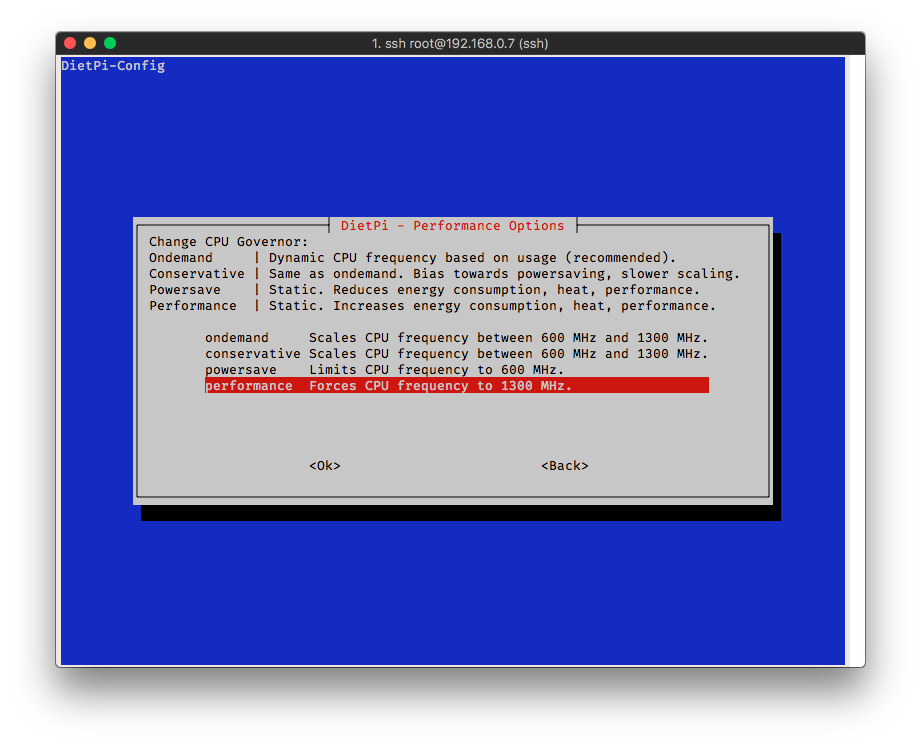
then select 3 Performance Options
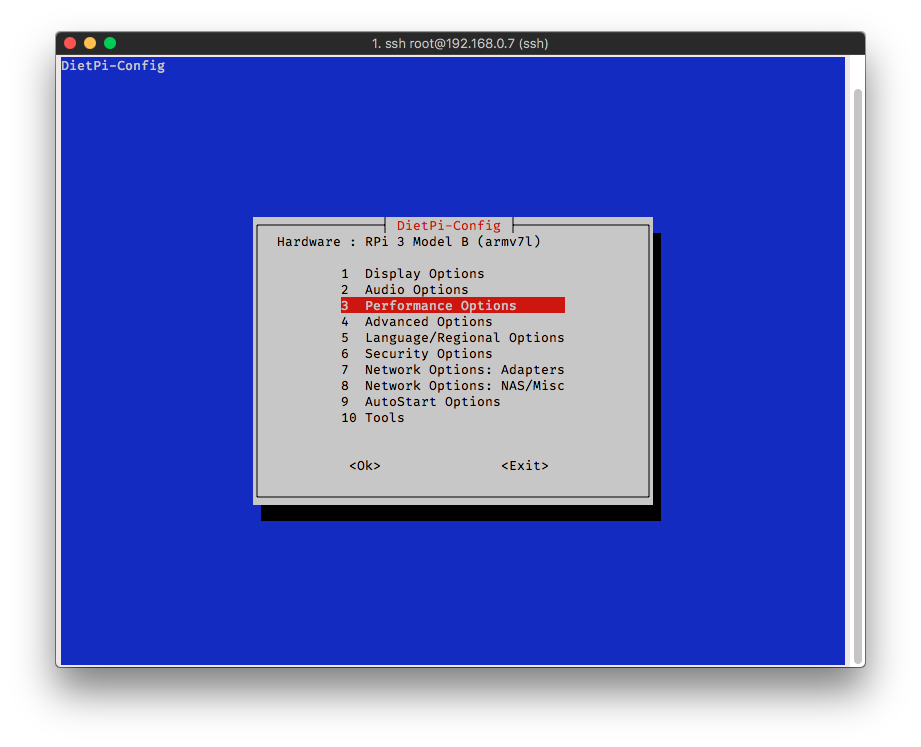
Select Change CPU Governor
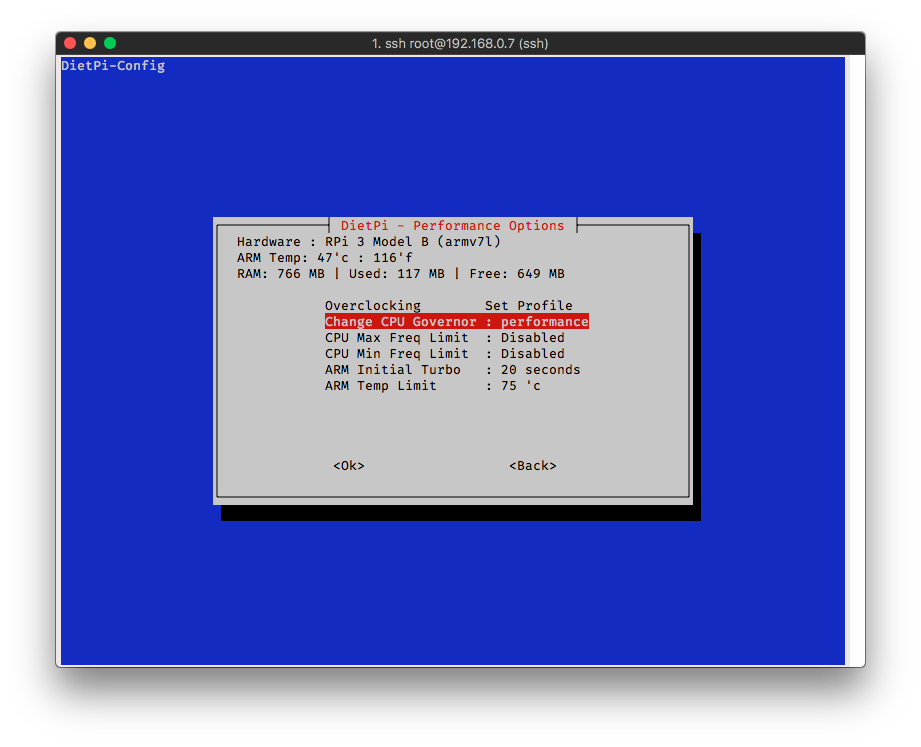
and set up to performance Forces CPU frequency to 1200 MHz.
- Disable video output
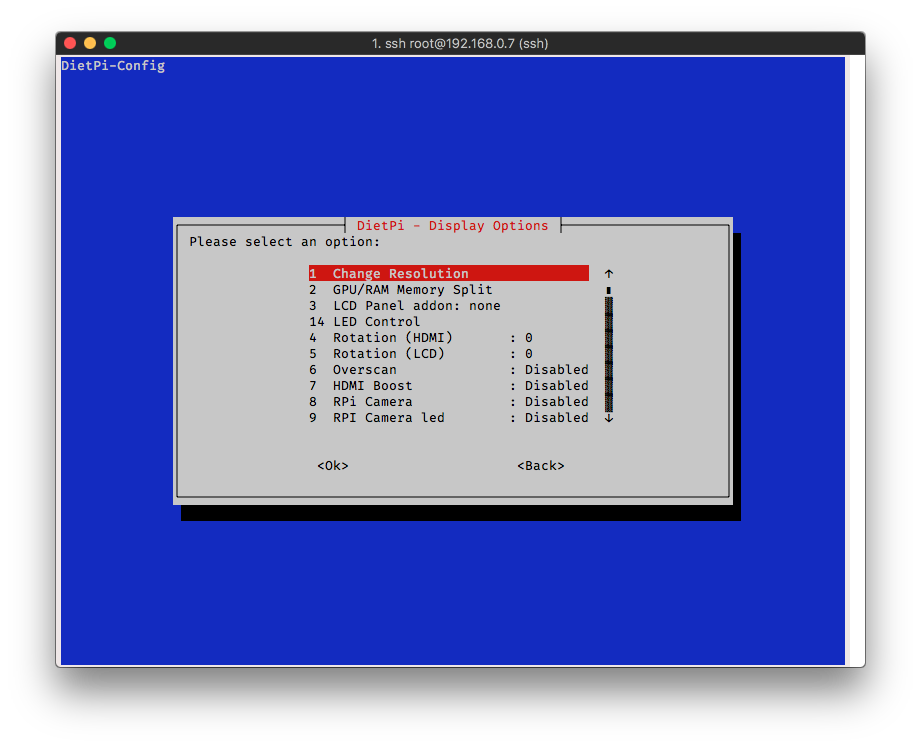
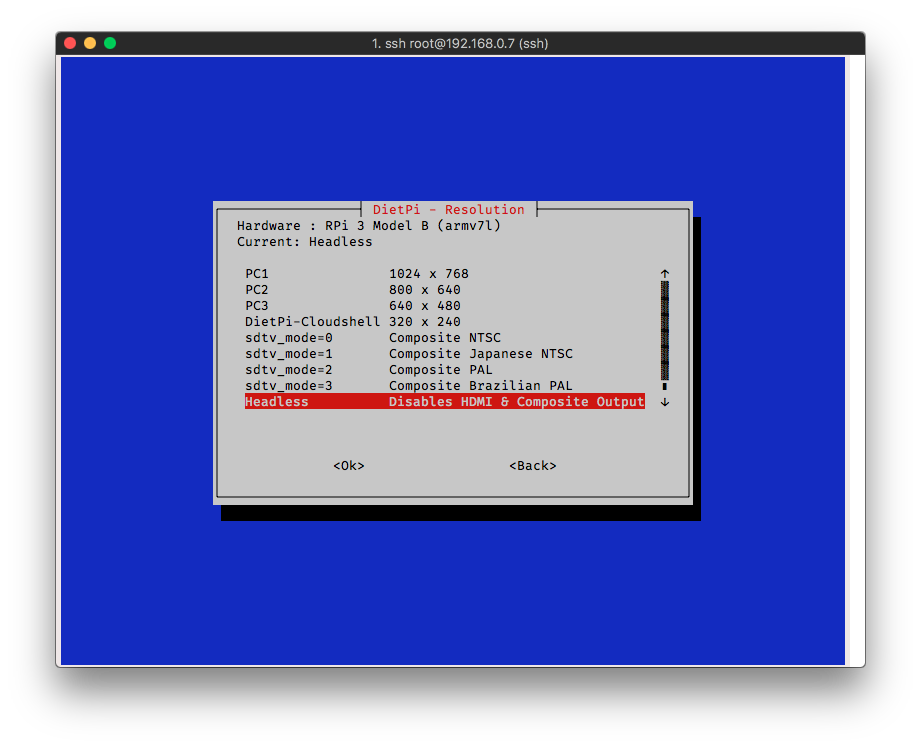
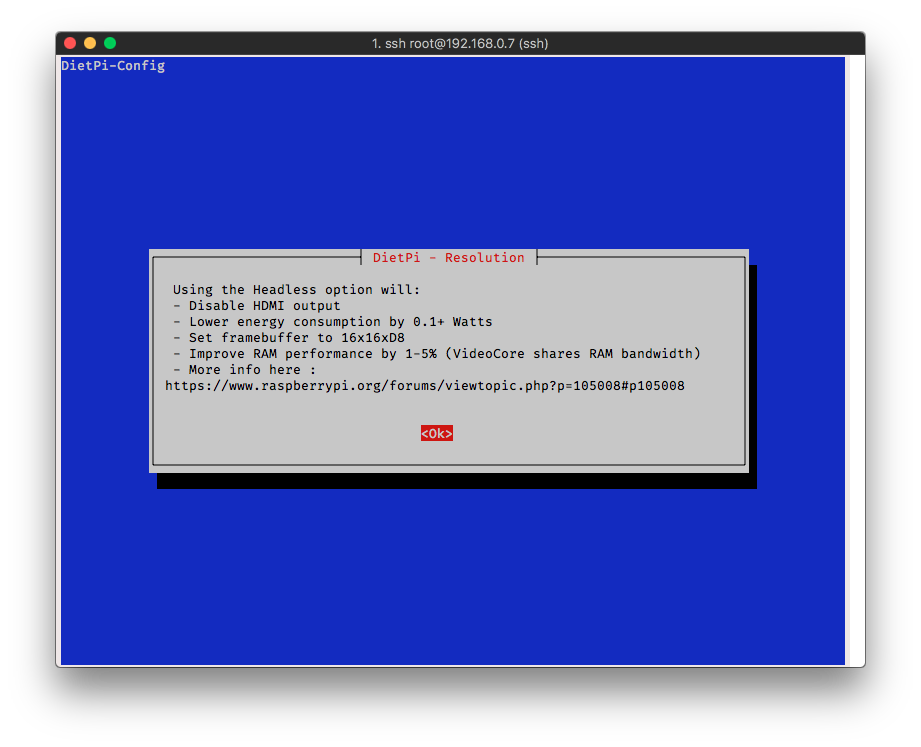
Using the Headless option will: │
│ – Disable HDMI output │
│ – Lower energy consumption by 0.1+ Watts │
│ – Set framebuffer to 16x16xD8 │
│ – Improve RAM performance by 1-5% (VideoCore shares RAM bandwidth) │
│ – More info here : │
│ https://www.raspberrypi.org/forums/viewtopic.php?p=105008#p105008
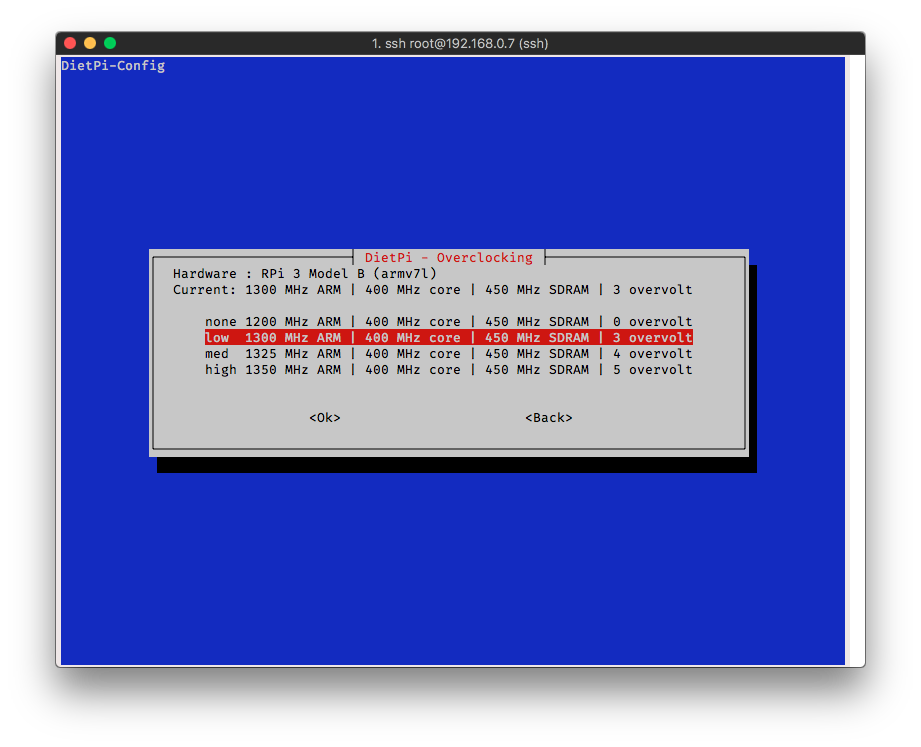
- Optional: overlocking
Overlocking CPU would improve the perfernce, but it may increase the instability and lost the guaranteed. Personally, I choose low 1300 MHz ARM | 400 MHz core | 450 MHz SDRAM | 3 overvolt — it works pretty well till now.
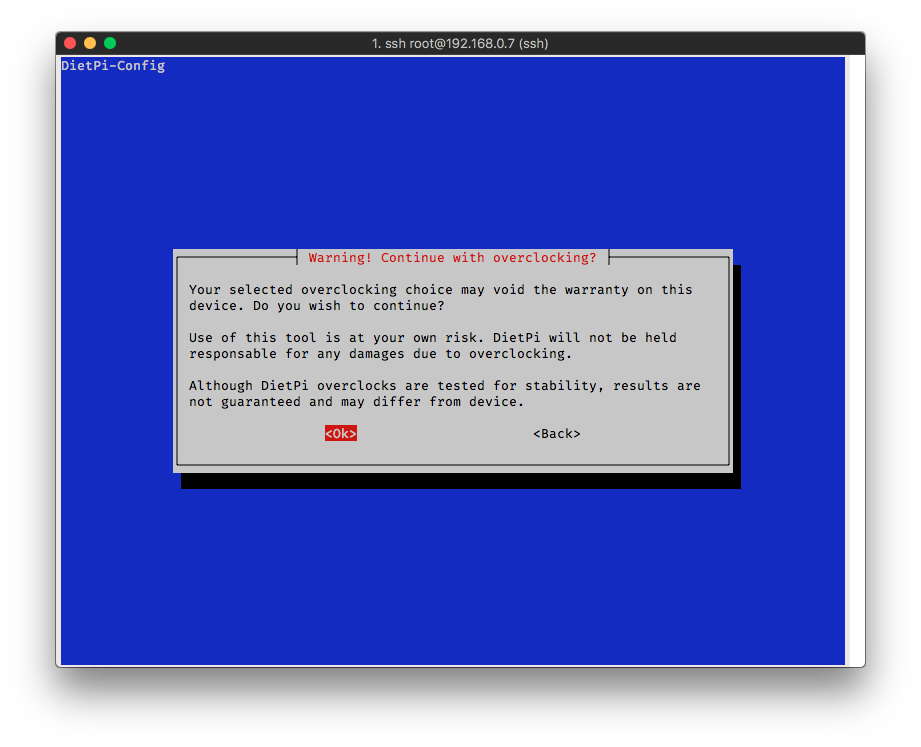
┌──────────────┤ Warning! Continue with overclocking? ├──────────────┐
│ │
│ Your selected overclocking choice may void the warranty on this │
│ device. Do you wish to continue? │
│ │
│ Use of this tool is at your own risk. DietPi will not be held │
│ responsable for any damages due to overclocking. │
│ │
│ Although DietPi overclocks are tested for stability, results are │
│ not guaranteed and may differ from device. │
│ │
│ <Ok> <Back>
Finally
Finally we arrived the the end of rigmarole process. Be patient and we will reach a high level of voice quality after the crucible of desire:
- Autostart of AirPlay
Method of Apt-get is automatically starts with system startup, otherwise enable DietPi-AutoStart Choose what software runs after boot.
- How to poweroff the system?
Since DietPi is a real deal of Linux system, theoretically, it should be shutdown by soft-off, otherwise have the risk of dataloss. But actually since Raspberry Pi have no physical button of power management, I shut it down by switching off the power supply.
Advanced steps
ALSA Mixer : Launches ALSA Mixer, tweak sound card settings
A brief review of Audiophonics ES9028Q2M
The sound is good enough, hight price but no another choice.
Bug founded
When enable EQ setting, the Airplay will remain with mute after the restart of DietPi service
The main subassembly of Audiophonics I-Sabre DAC ES9028Q2M
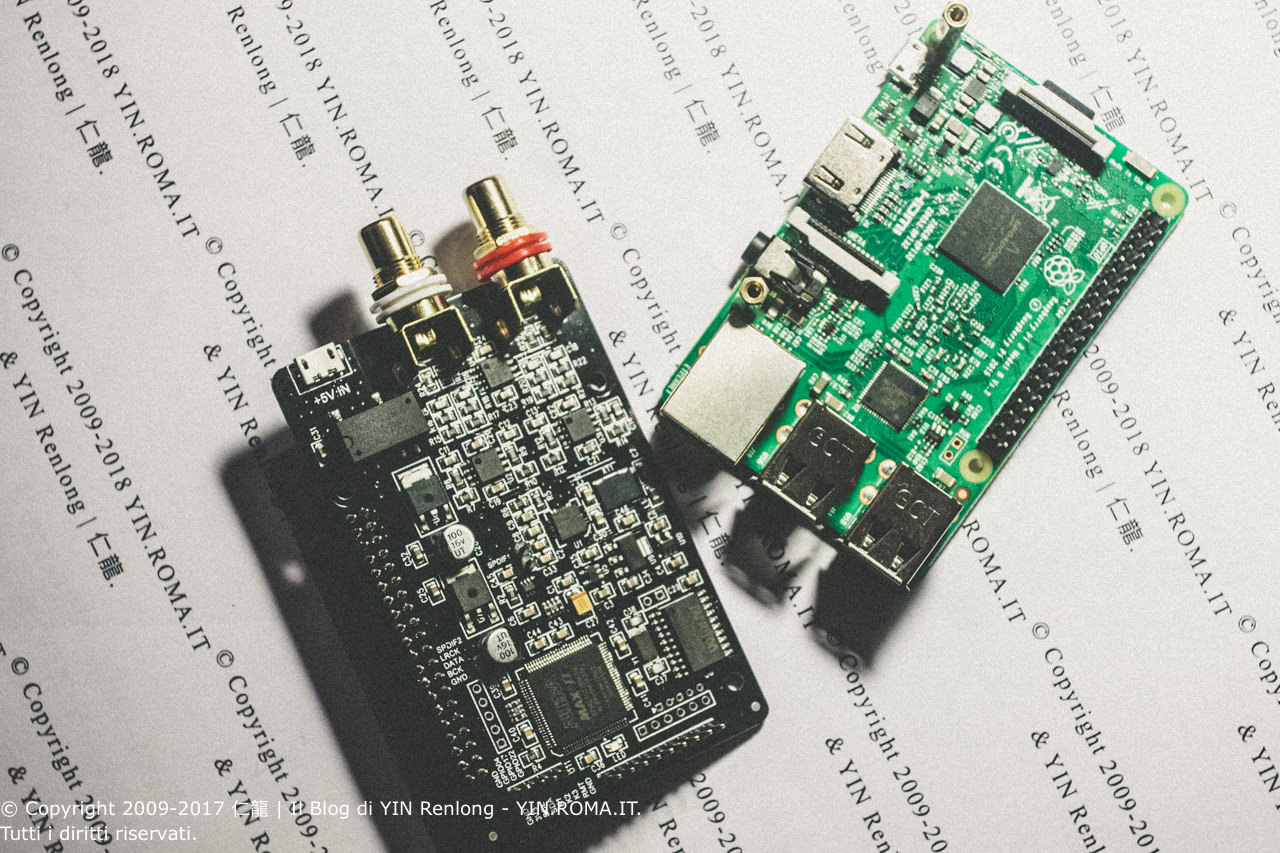
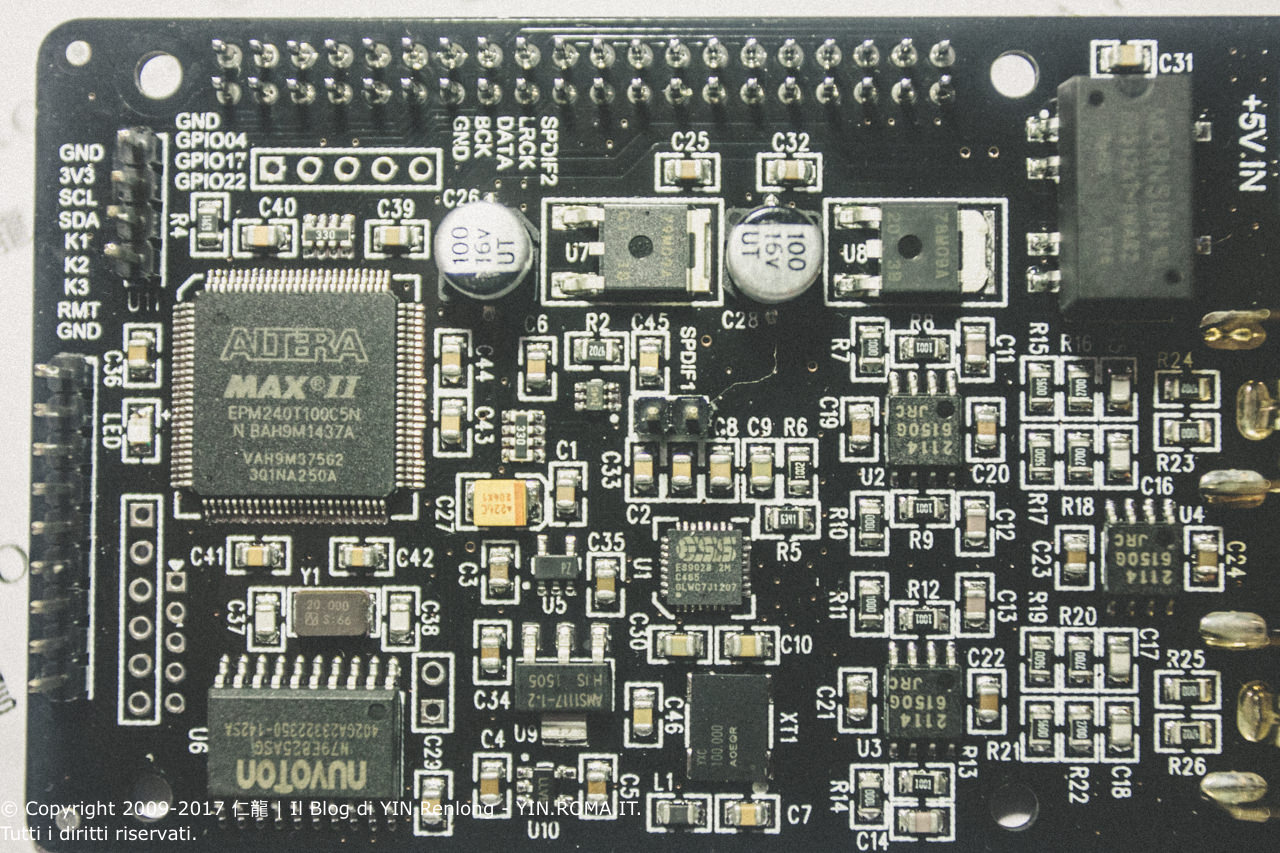
- 1x ES9028Q2M from ESS Technology (offical website has deleted the details of this DAC, the archive can be found here)
-
1x Low-Noise Dual Operational Amplifier: NJM2114 from New Japan Radio Co.,Ltd)
General Description
The NJM2114 is a high performance dual low noise operational amplifier that could be replaced in application with the NJM5532. Comparing to the NJM5532; it has superior specifications on Slew Rate,Bandwidth and Offset Voltage. Furthermore lower noise and distortion are achieved,it is applicable for Hi-Fi audio equipments.
- 3x NJM2114 (6150G): Low-Noise Dual Operational Amplifier from New Japan Radio Co.,Ltd (NJR) ( <https://www.njr.com/semicon/products/NJM2114.html>)
-
1x CPLD (Complex Programmable Logic Devices), from Altera EPM240T100C5N (detail: <http://uk.farnell.com/altera/epm240t100c5n/ic-maxii-spi-cpld-201-1mhz-tqfp/dp/1453503>)
-
1x Microcontroller: Nuvoton TechnologyN79E825ASG (https://www.digikey.com.au/product-detail/en/nuvoton-technology-corporation-of-america/N79E825ASG/N79E825ASG-ND/4360596)
-
1x LDO (Low Dropout Regulator): Advanced Monolithic Systems AMS1117-1.2 ( <http://www.ams-semitech.com/attachments/File/AMS1117_20120314.pdf>)
A kind of Linear regulator, its purpose is to provide a stable DC voltage power supply, especially for dropout voltage (the difference of smaller output & input voltage)
- 1x 79m09a not sure the manufacture, speculate form STMicroelectronics
-
1x E0512XT-1WAR2 DC/DC Converter, from Mrnsun ( <http://www.mornsun-power.com/uploads/pdf/E_XT-1WAR2.pdf>)
VDC 12V
- 2x RCA Jack, speculate from AEC Connector
-
Unknown component: 1x YXC 10,000 AOCQR
Need to practice in the future
- [ ] Test with linear power supply
-
Volumio has not provided a history version of 2.344, unfortunately Audiophonics provides the old version which supports strictly to 2.344 (till 24 dic, 2017) — the plugin which provided by Audiophonics is unable to work proprioly, if you happened to buy this audio DAC card within this period. ↩
- Which can be found here: <https://www.audiophonics.fr/en/diy-dac/audiophonics-i-sabre-dac-es9028q2m-kali-edition-raspberry-pi-3-2-i2s-p-12212.html> ↩
- <http://dietpi.com/phpbb/viewtopic.php?f=8&t=5&p=1549> ↩
